
Setting Up Clojure with IntelliJ IDEA
For this course we will be using the Clojure programming language with the IntelliJ development environment. IntelliJ is available for Windows, OS X, and Linux.
Installation
- Download and install the Community edition of JetBrains’ IntelliJ IDEA for your operating system. Use all the default options when installing the program.
-
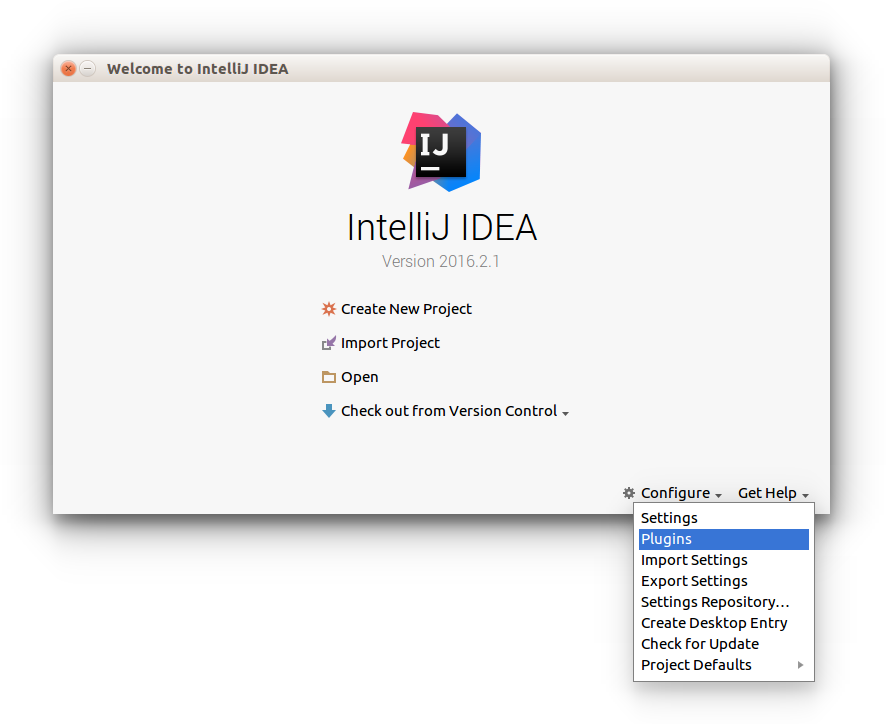
The first time you run IntelliJ select the Plugins option from the Configure menu at the welcome screen:
In the plugins window, press the Browse Repositories... button and search for cursive:
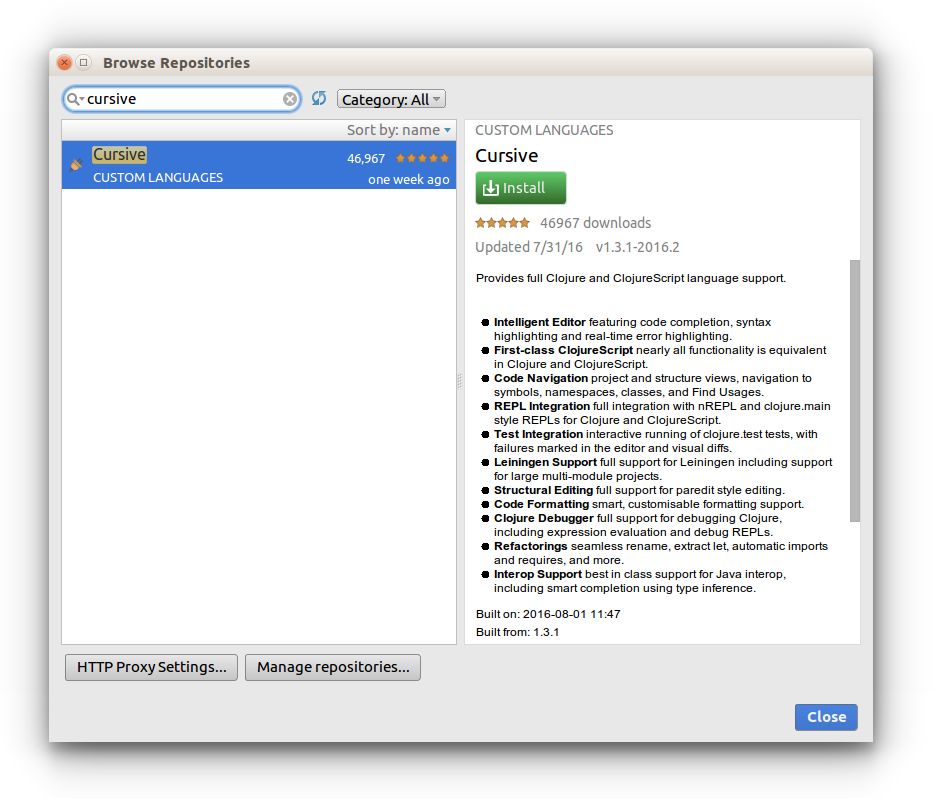
Install the Cursive plugin using the green Install button. Press the Restart IntelliJ IDEA button when it appears.
Project Creation
-
Download and extract the Clojure SDK files.
-
In the welcome screen select the Create New Project option.
-
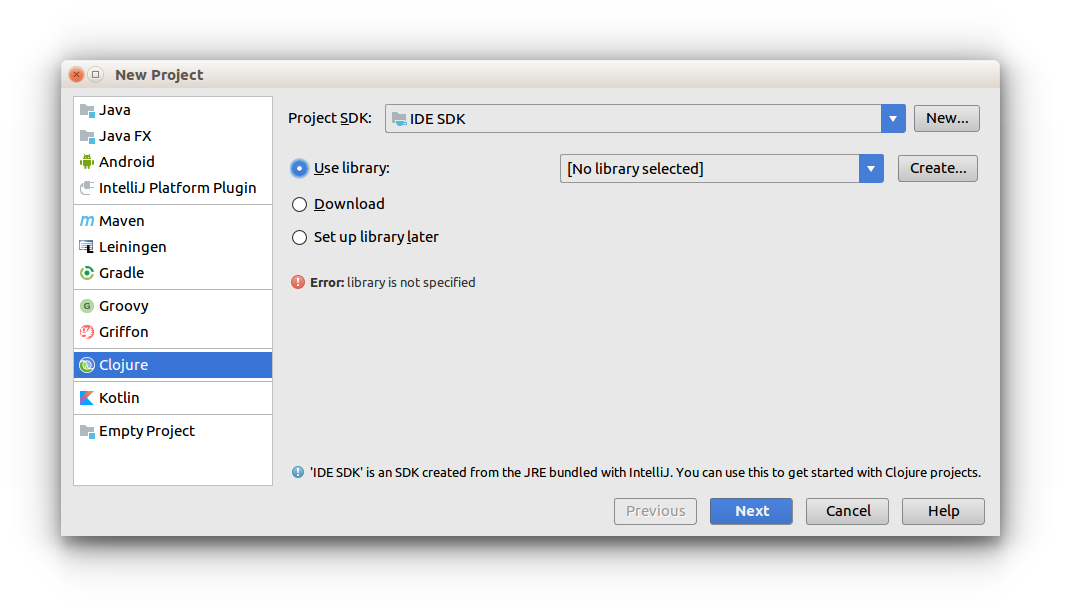
Make sure the Clojure option is selected from the left panel. Select the Use library radio button and press the Create... button.
In the New Library Files window, go to the
clojure_sdk_filesdirectory (from step 1) and select the three JAR files contained there:-
clojure-1.8.0.jar -
core.logic-0.8.11.jar -
math.numeric-tower-0.0.4.jar

Press the OK button and then Next.
-
-
Specify the Project name.
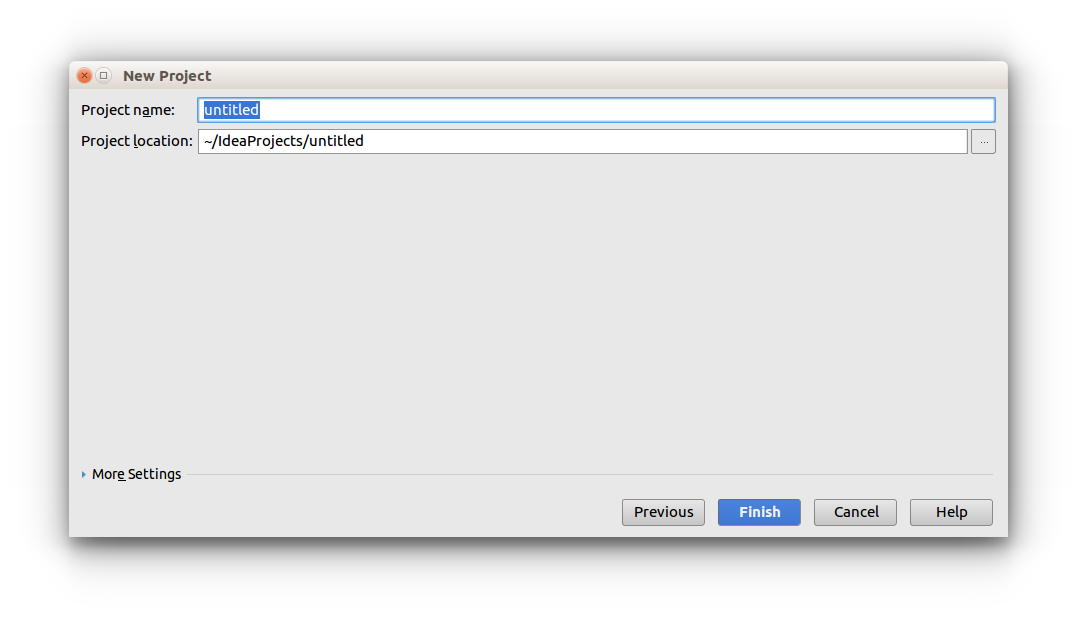
Press the Finish button.
-
The first time you create a Clojure project a Licence Required message will appear at the bottom of the main window inside an event log pane.
You’ll need to request a licence for Cursive. Follow the previous link, and in the Choose licence type option select Non-Commercial because you’ll be using Cursive for student work (and otherwise you’d have to pay $99 USD for it). You’ll receive the licence in your e-mail.
Once you’ve got the licence, go back to the event log pane, click on the activate it link and copy/paste your Licence Certificate.
Using the REPL (Read-Eval-Print-Loop)
-
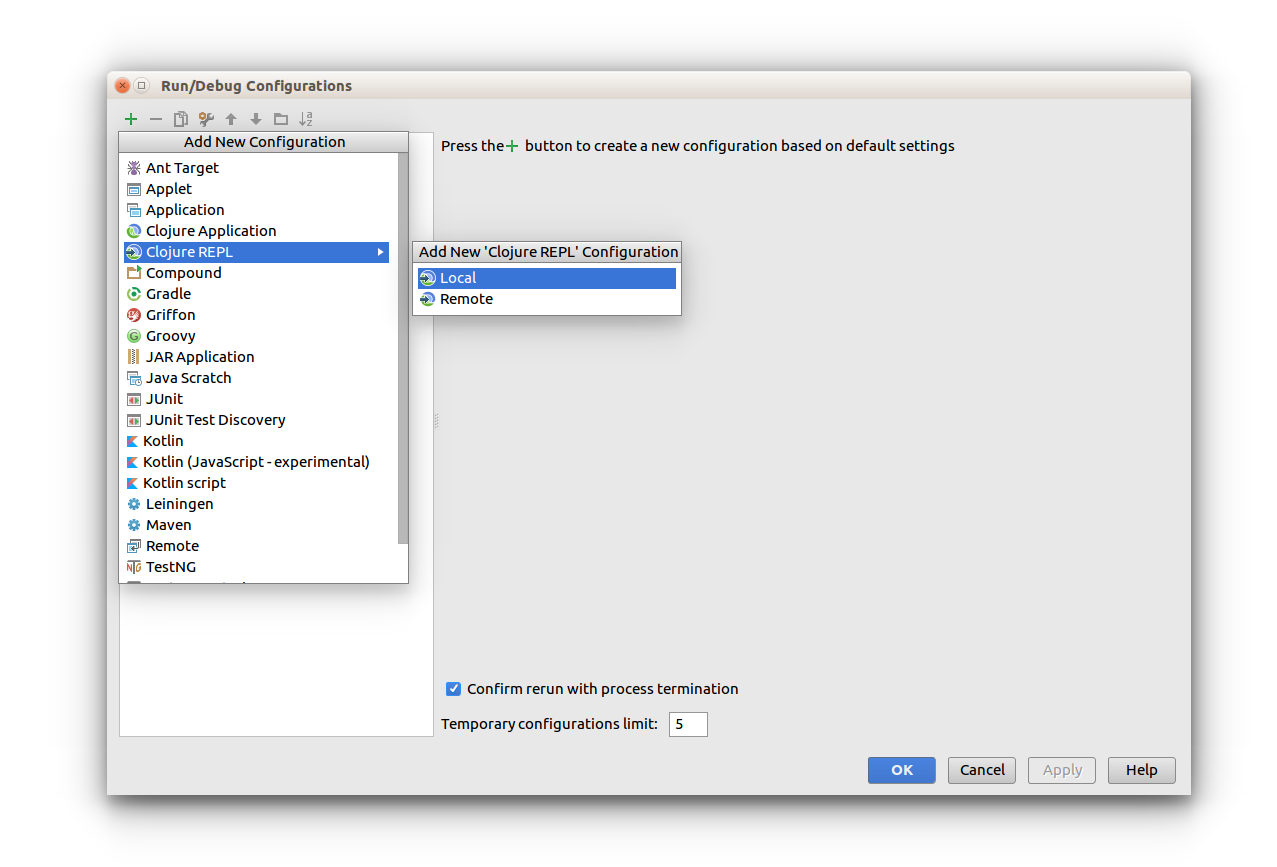
In IntelliJ’s main menu choose Run and then select Edit Configurations... Press the green plus symbol and select Clojure REPL and Local REPL.
-
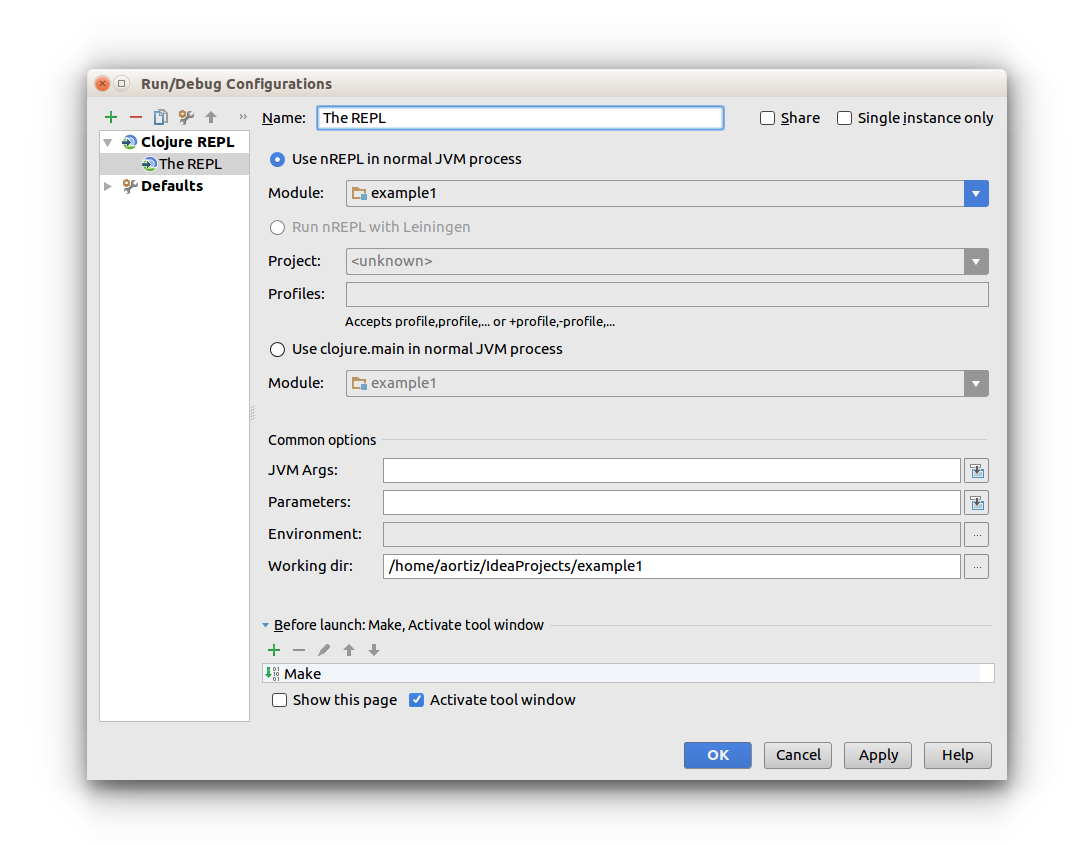
Specify a Name (for example The REPL) and select the Use nREPL in normal JVM process radio button. Press the OK button.
- Press Shift+F10 to open the REPL window for the first time.
Using Clojure Source Files
-
To create a new Clojure source file, expand the project in IntelliJ’s left hand panel and select the
srcdirectory. Then, from the main File menu select New followed by File. Type the file name in the dialog window. NOTE: Clojure source files should have a.cljextension. - To send your file’s contents to the REPL, open the editor’s context menu (mouse right-click) and select REPL and Load file in REPL.
-
To run the program contained in your file, press
Ctrl+Shift+F10, or you can also use the editor’s context menu.